How To Add Google Translate Widget In Blogger
by JSM Hemant |
July 24, 2025
how to add Google Translate Widget in blogger
If Your Blog Gets Visitors From Different Countries Or You Write In A Regional Language, Then Adding A Translate Option Is Super Useful. It Helps People Read Your Blog In Their Own Language With Just One Click — Without You Needing To Create Multiple Versions.
But Here’s The Thing — Blogger Doesn’t Come With A Built-In Translate Feature. Luckily, Google Provides A Free Widget That You Can Add To Your Blogger Site. It’s Simple, Clean, And Doesn’t Require Any Complex Code Or Plugin.
In this blog, we’ll understand why this button is helpful and how to add a Google Translate widget To Blogger in a few steps.
Why You Need To Add A Google Translate Widget In Blogger?
In today’s World, anyone from any part of the world can land on their blog, thanks to Google search, social media, and backlinks.
But If Your Blog Is Only In English, Then Many Non-English Visitors Might Leave Without Even Reading A Single Line.
That’s Why Adding A Translate Button Is A Smart Move.
- It Lets Users Choose Their Own Language — So They Can Understand Your Content Clearly.
- It Helps You to target the global Audience Apart from English readers.
- It Makes Your Blog More Friendly, Inclusive, And Easy To Explore For Everyone, without a language barrier.
How To Add Google Translate Widget In Blogger?
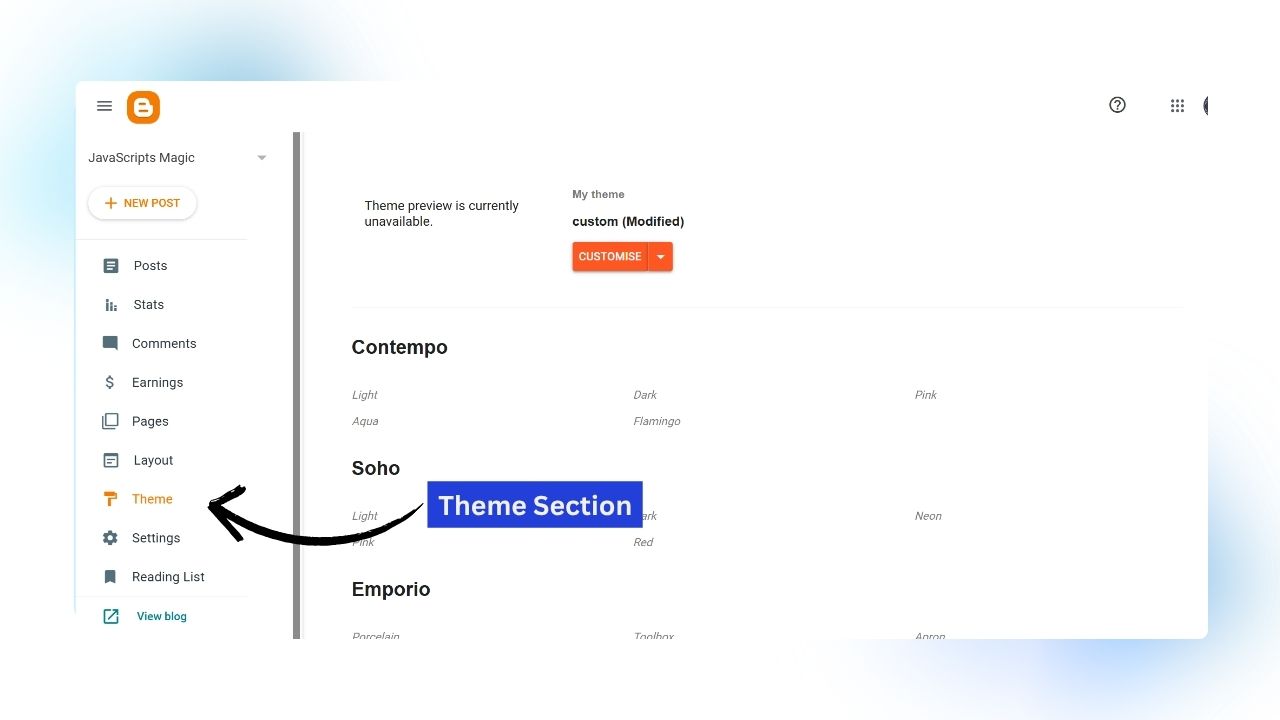
Step 1
Go To Blogger Dashboard & Navigate To The Theme Section As Shown In Above Image.
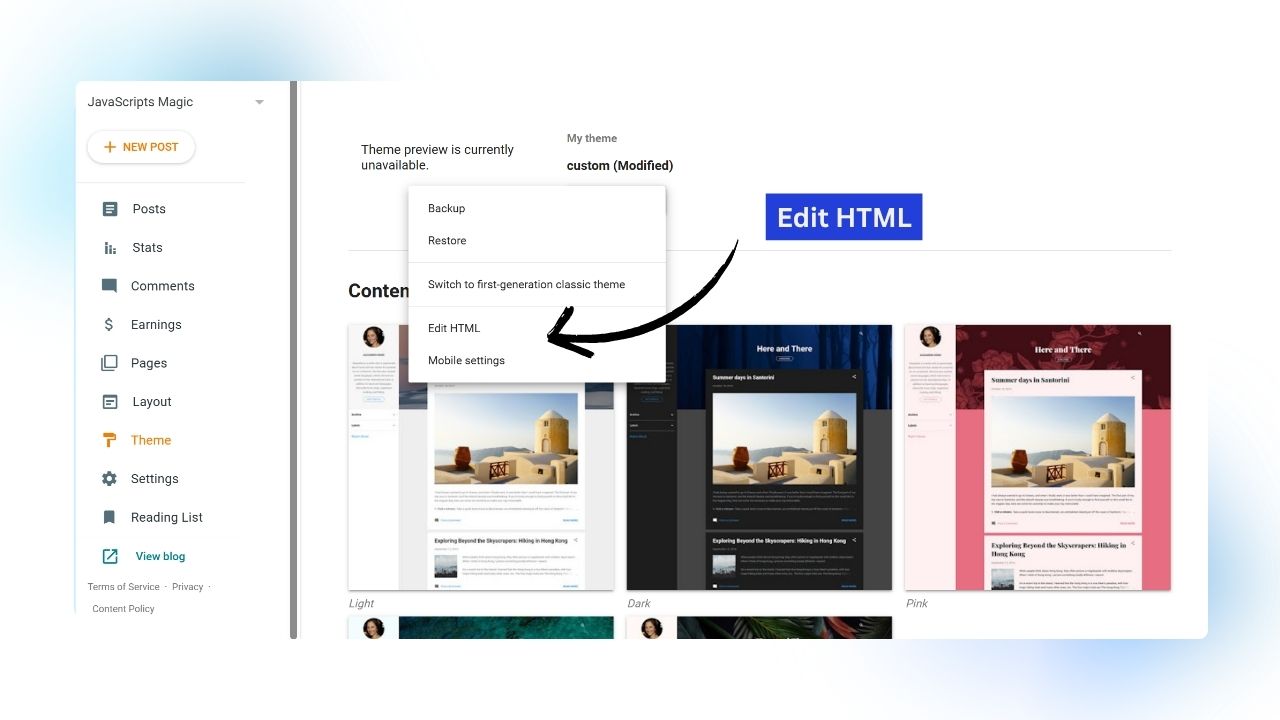
Step 2
Now Click On Edit HTML That will take you to the theme editor of blogger, where we will add the code of google translate button.
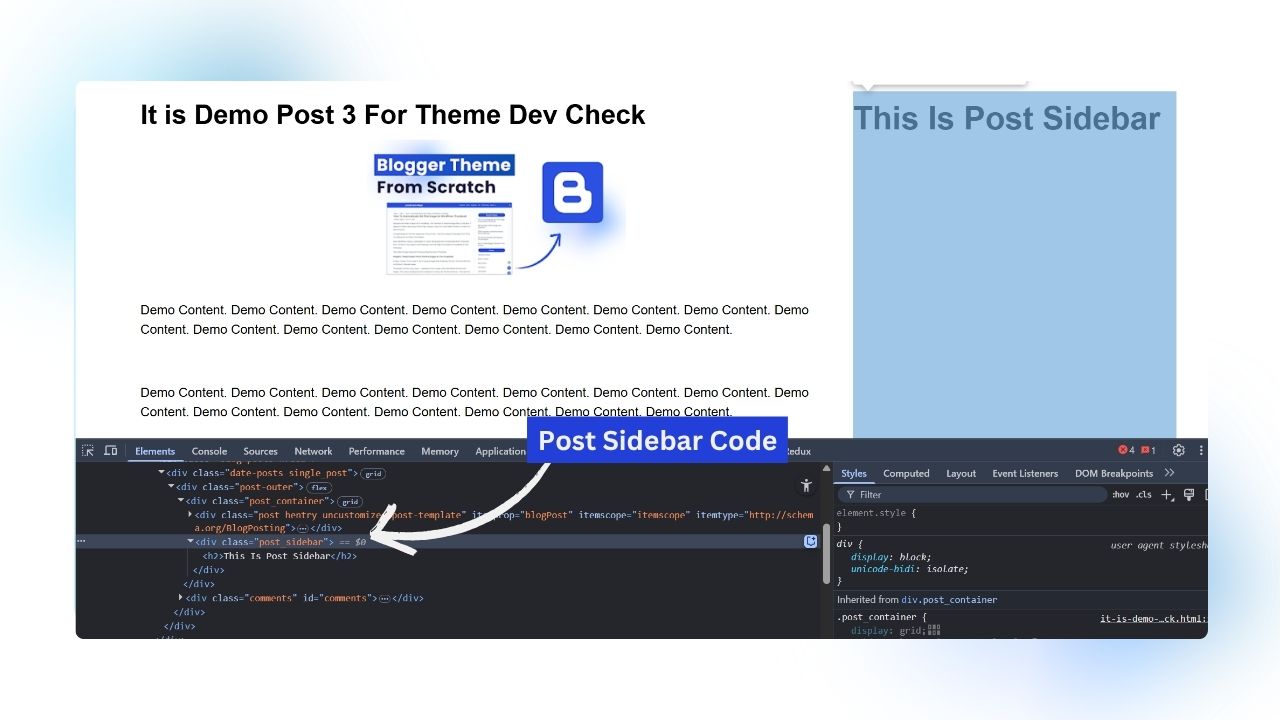
Step 3
After that you have to decide where you want to add the google translate button in my case i want to add google translate button in sidebar. Now we have to find the sidebar of blogger theme. You can easily find any element of your theme with chrome inspector tool as shown in above image. The class of sidebar element is “post_sidebar”.
If you find this process of finding the code in edit html section of blogger complex then you can go to the layout section and add the code given in following steps as gadgets.
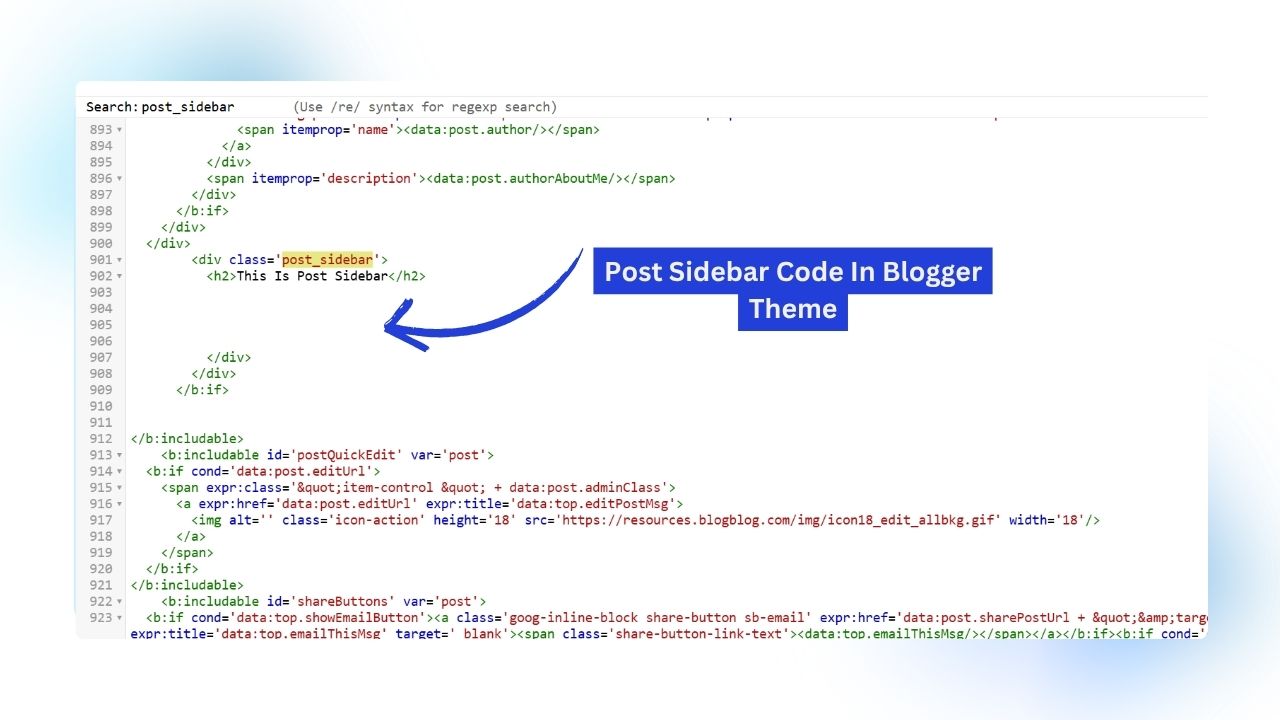
Step 4
Search for “post_sidebar” in blogger theme as shown in above image. Now we will put the google translate widget code in this section.
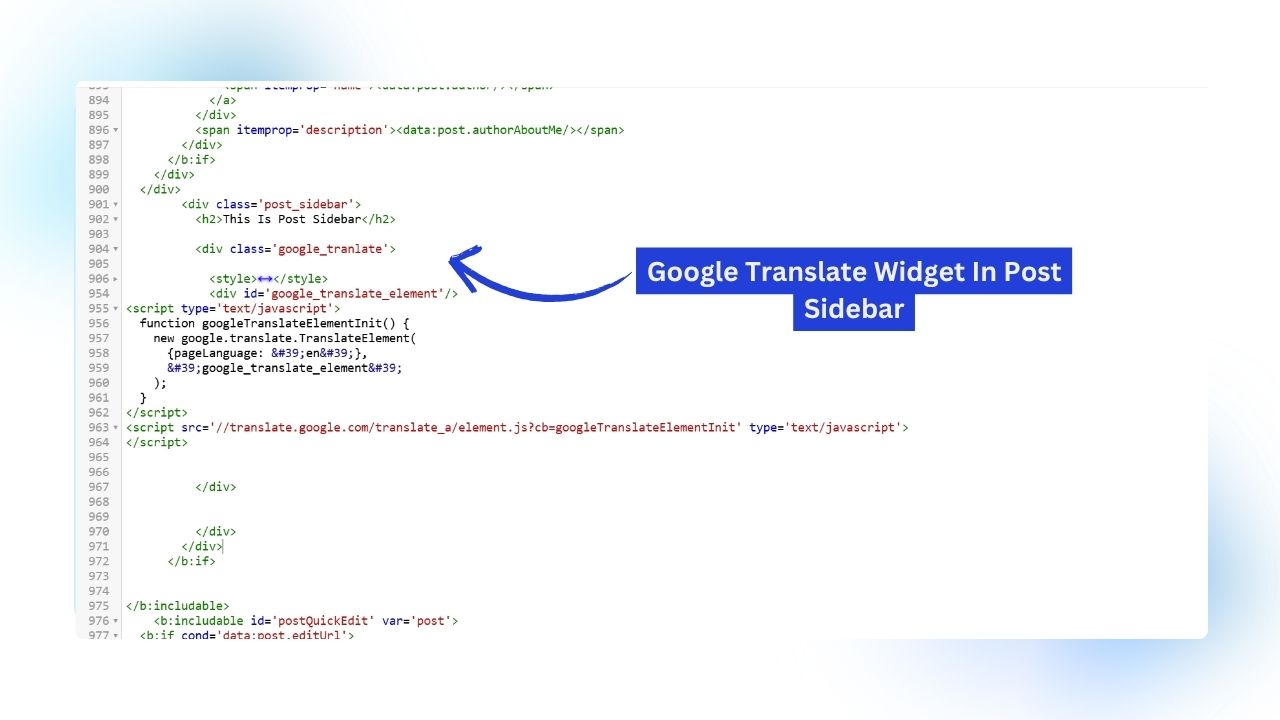
Step 5
Add The Following Code Of Google Translate Button In post_sidebar div and save the template as shown in above image:
<div class='google_tranlate'>
<style>
/* Updated Translate Container Style */ #google_translate_element { text-align:
center; margin: 14px auto; padding: 28px 9px; width: fit-content; background-color:
#f5f5f5; border-radius: 8px; box-shadow: 0 2px 6px rgba(0,0,0,0.1); font-family:
'Segoe UI', Tahoma, Geneva, Verdana, sans-serif; } /* Dropdown
Style */ .goog-te-combo { padding: 8px 12px; border: 1px solid #ccc; border-radius:
6px; background-color: #fff; font-size: 14px; color: #333; cursor: pointer;
transition: all 0.3s ease; font-family: inherit; } /* Hover and Focus Effects
*/ .goog-te-combo:hover, .goog-te-combo:focus { border-color: #007bff;
box-shadow: 0 0 5px rgba(0, 123, 255, 0.4); outline: none; } /* Hide Google
Translate top banner */ .goog-te-banner-frame.skiptranslate, body >
.goog-te-banner-frame { display: none !important; height: 0 !important;
} body { top: 0px !important; }
</style>
<div id='google_translate_element' />
<script type='text/javascript'>
function googleTranslateElementInit() {
new google.translate.TranslateElement({
pageLanguage: '
en & #39;
},
' google_translate_element & #39;);
}
</script>
<script src='//translate.google.com/translate_a/element.js?cb=googleTranslateElementInit'
type='text/javascript'>
</script>
</div>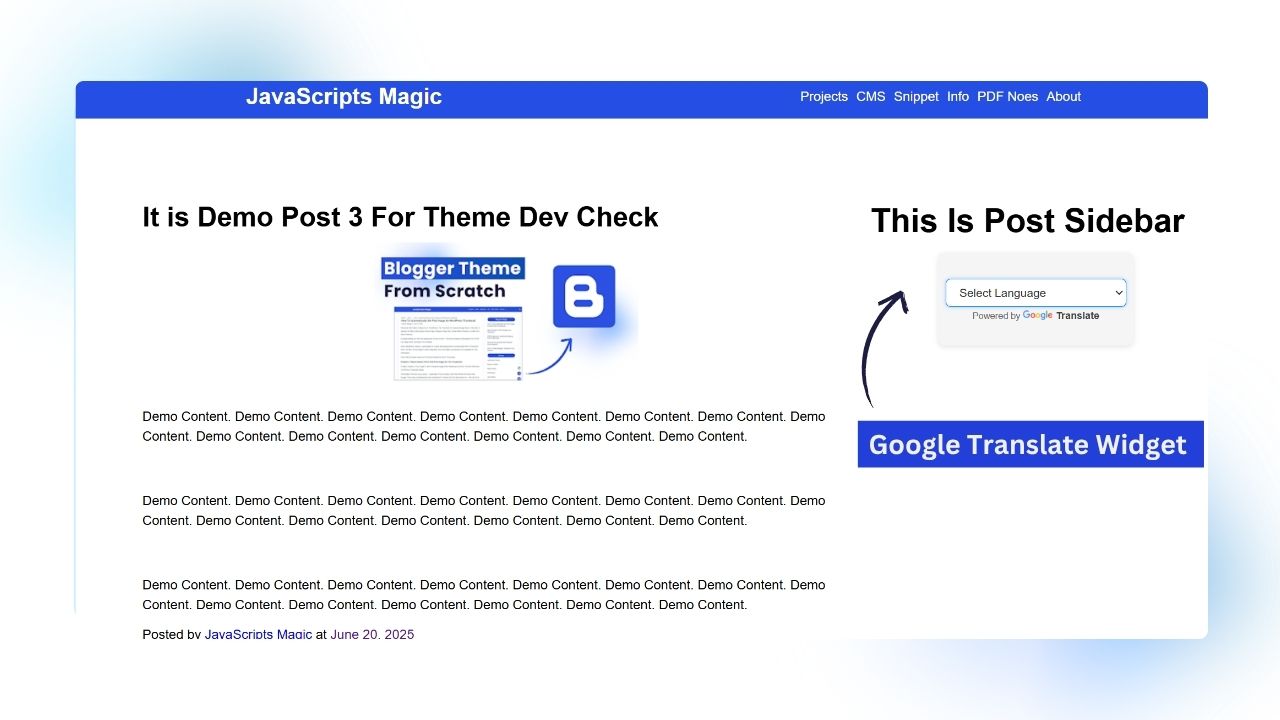
Step 6
Now Visit Any Post of Your Theme You can see the google translate widget in as shown in above image.
In This Way You Can Add Google Translate widget In Blogger without using any third party service. The same process allows you to put google translate widget in the WordPress.